making a keyboard again
I'm going to be making another split ergo keyboard, I'm keeping random info here for now and might make this into my documentation
16 bit extender chipblobby redox manuform 70 key
trackball manuform 74 key
trackball
someone who made a split with trackball
adereths wiring guide
switches/caps
Dactyl scad file generator
Keyboard layout editor (needed for next site)
Keyboard firmware generator
So far, I was thinking of making one with a trackball (decided not to). Was thinking about either using a laptop-nub style one or an actual trackball. The nub is only about as big as one of the keys, so it wouldn't take that much modification if I didn't want to use the one thats on thingiverse. I decided I don't want to use that for my setup though since videos of people using it make it seem pretty annoying to use on a large display, and I have 2 big ass monitors.
For a normal style trackball, I was thinking of using the tiny mouse I put inside my current dactyl and making it into a custom trackball. For my current dactyl, I found a *tiny* mouse in my roommate's junk drawer, and took the plastic shell+buttons off to make it as small as possible. I had to shave off some of the PCB to make it fit. Then I fixed it into the bottom inside of my right-hand dactyl, with a hole in the bottom so the laser would work. There's an extra USB cable hanging out the back, since it's just an entire mouse inside the keyboard. It works, I can move my right keyboard around on my desk like a mouse. But, the keyboard is just too big and heavy for it to be comfortable or practical. I don't have enough nearly enough space on my deskmat with my tablet, either.
I tried rolling a large glass marble around on the bottom of my mouse, and it actually tracked the movement, as smooth as I would expect for just rolling an unfastened ball around on the bottom of a mouse. One of the axis would need to be flipped somehow (up-down was fine, left-right were reversed), but if I really wanted to I could add some housing for the marble+the tiny mouse pcb onto the manuform.
Here are some people that actually did this (with pictures):
A mini manuform with the trackball tucked between the main body and thumb cluster. They link to another trackball dactyl project (with buildlog) they were inspired by.
A standard manuform with a trackball directly on the thumb cluster. They also tried it with a joystick instead, but said the trackball was better.
I decided I won't do a trackball this time though. Maybe next time.
Instead, I decided to do something way more insane and try recreating a dactyl in Blender using geometry nodes.
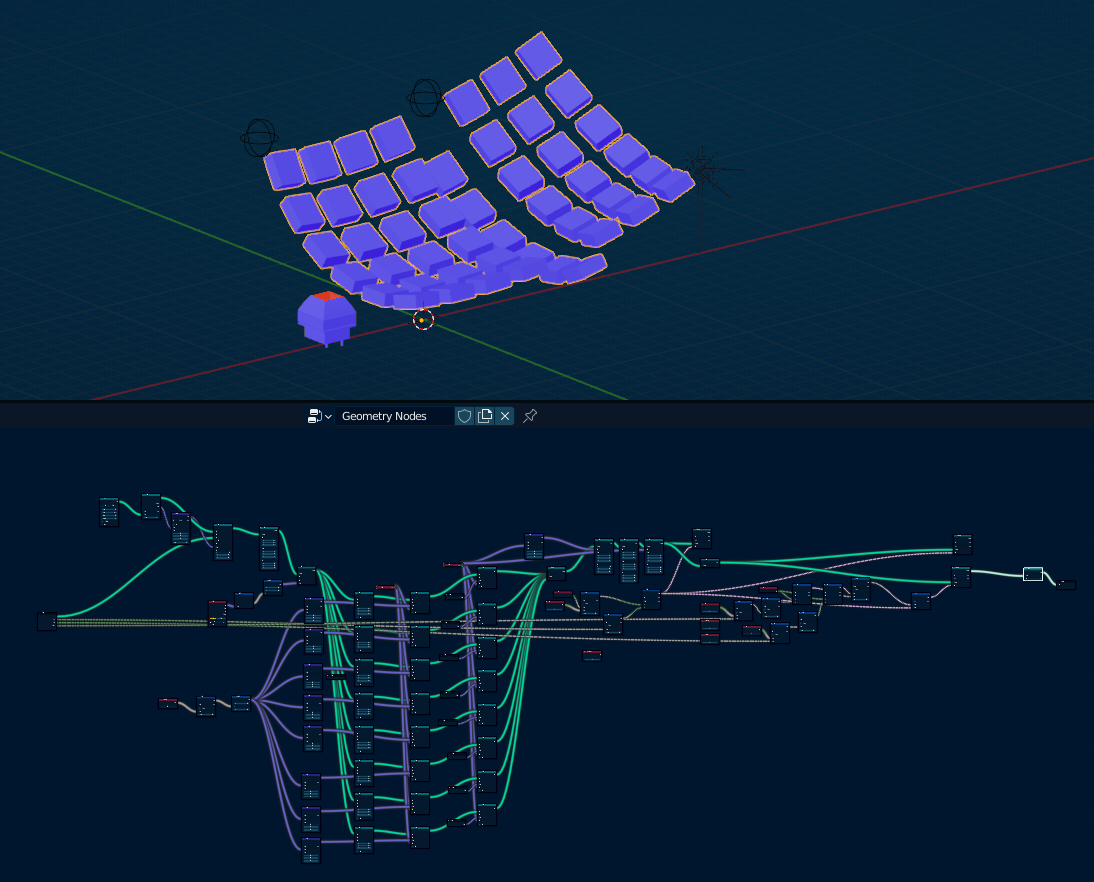
I learned a lot about geometry nodes and I'm pretty happy with it so far, but it's still way too glitchy for me to want to actually print anything with. I'm just going to generate an scad model using this site and tweak it if I want to.
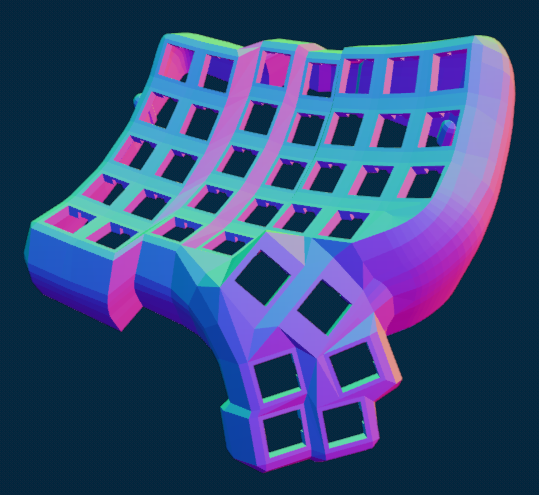
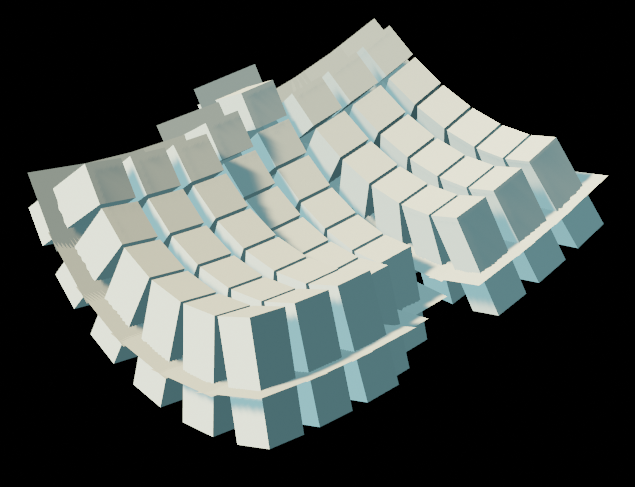
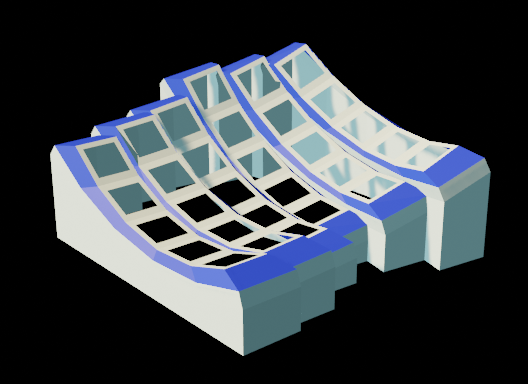
I got everything in the mail, so I'm printing the first piece now. This is the tweaked version of the keyboard I generated. The options were 6 columns, 5 rows, extra inner ergodox keys, and Kailh switch holes. It did say it was experimental, and it made some messed up geometry. It would have had some catastrophic errors while printing. I ended up doing a good amount of manual work remaking the shell and re-booling the keyholes out.
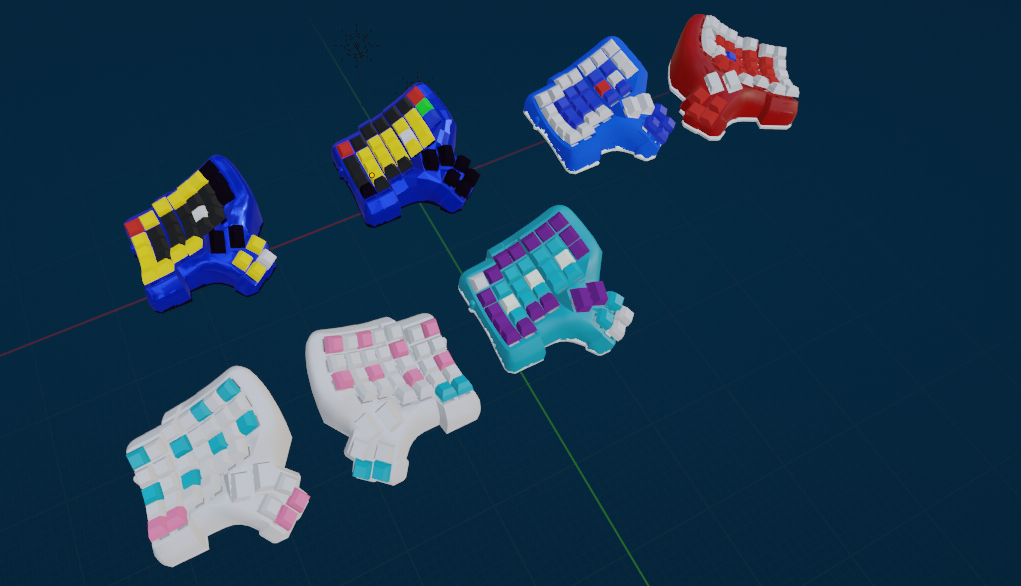
I tried out some color combos based on the XDA shaped keycaps that are available. I ended up going with the blue/yellow/black in the top middle, because it matches the cables I got from Zap (rip). The bottom left ones look really cool though.
I have those RGB keys for use in Blender to be XYZ. X and Z are already on the left half though so I'll make the red+blue keys do something else, but green will just be "Y". The yellow keys are actually transparent, I'm going to try and dye them flourescent yellow. I ordered those from china (keycaps are so fucking expensive from anywhere else), so they won't be here for another month.
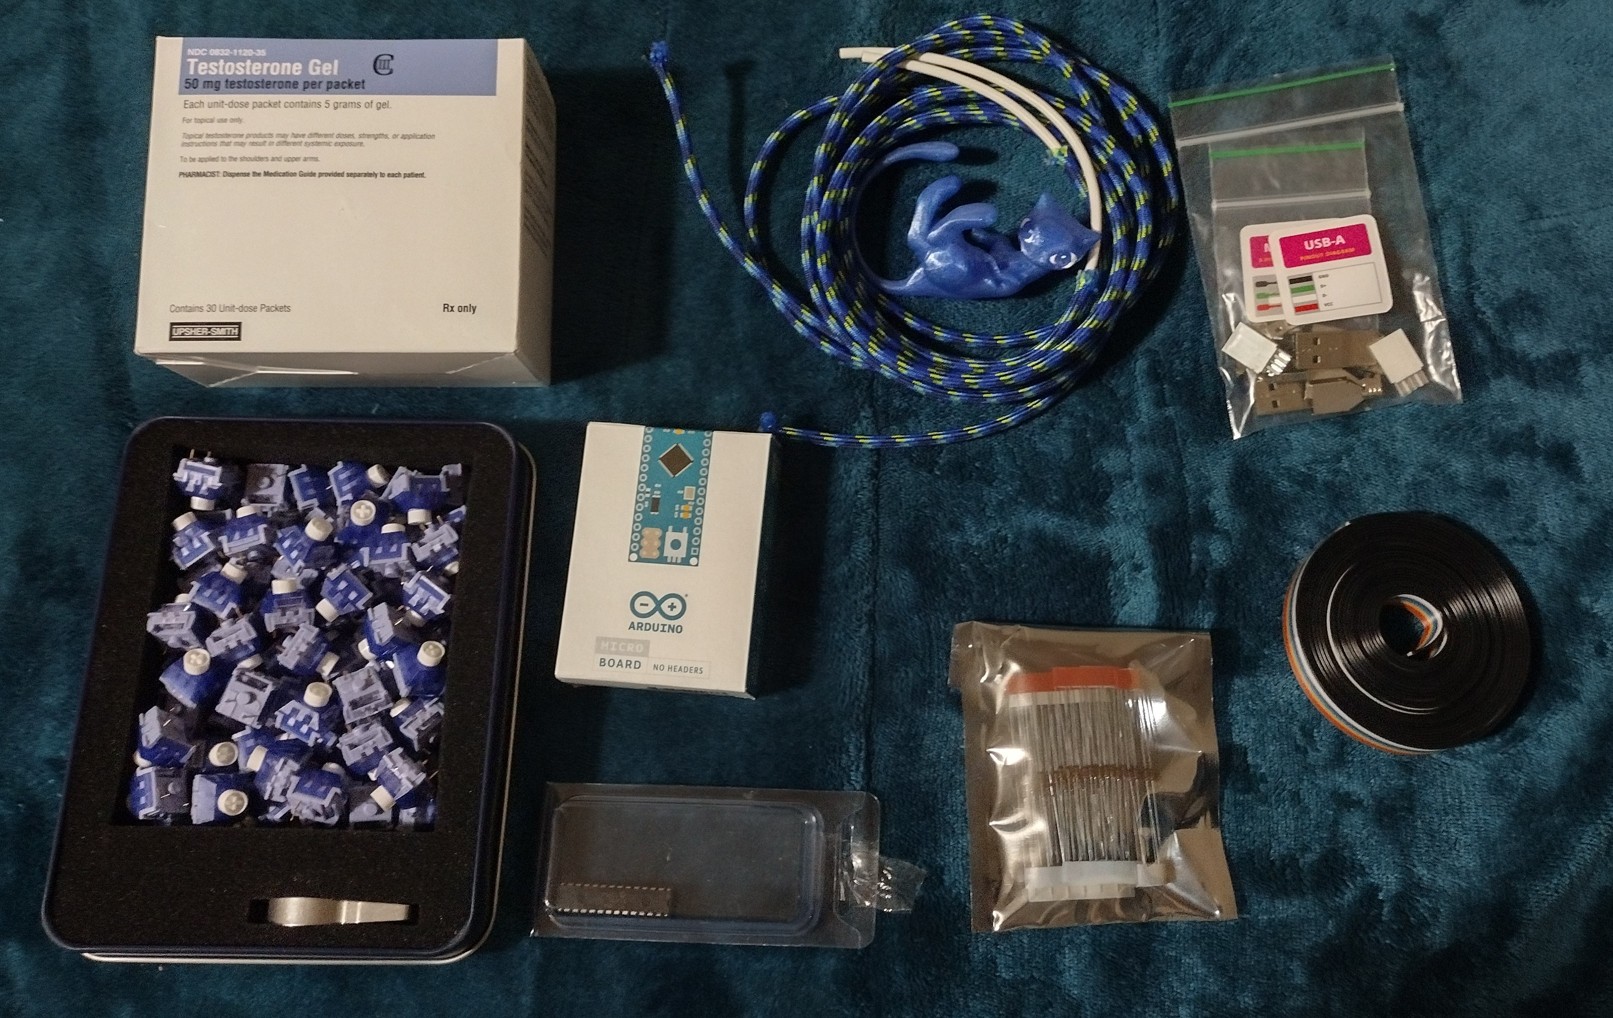
My supplies so far. Now I just have to wait a while for the pieces to print. The top shells take 29 hours each. Once I have one of those, I can start wiring.
The Build
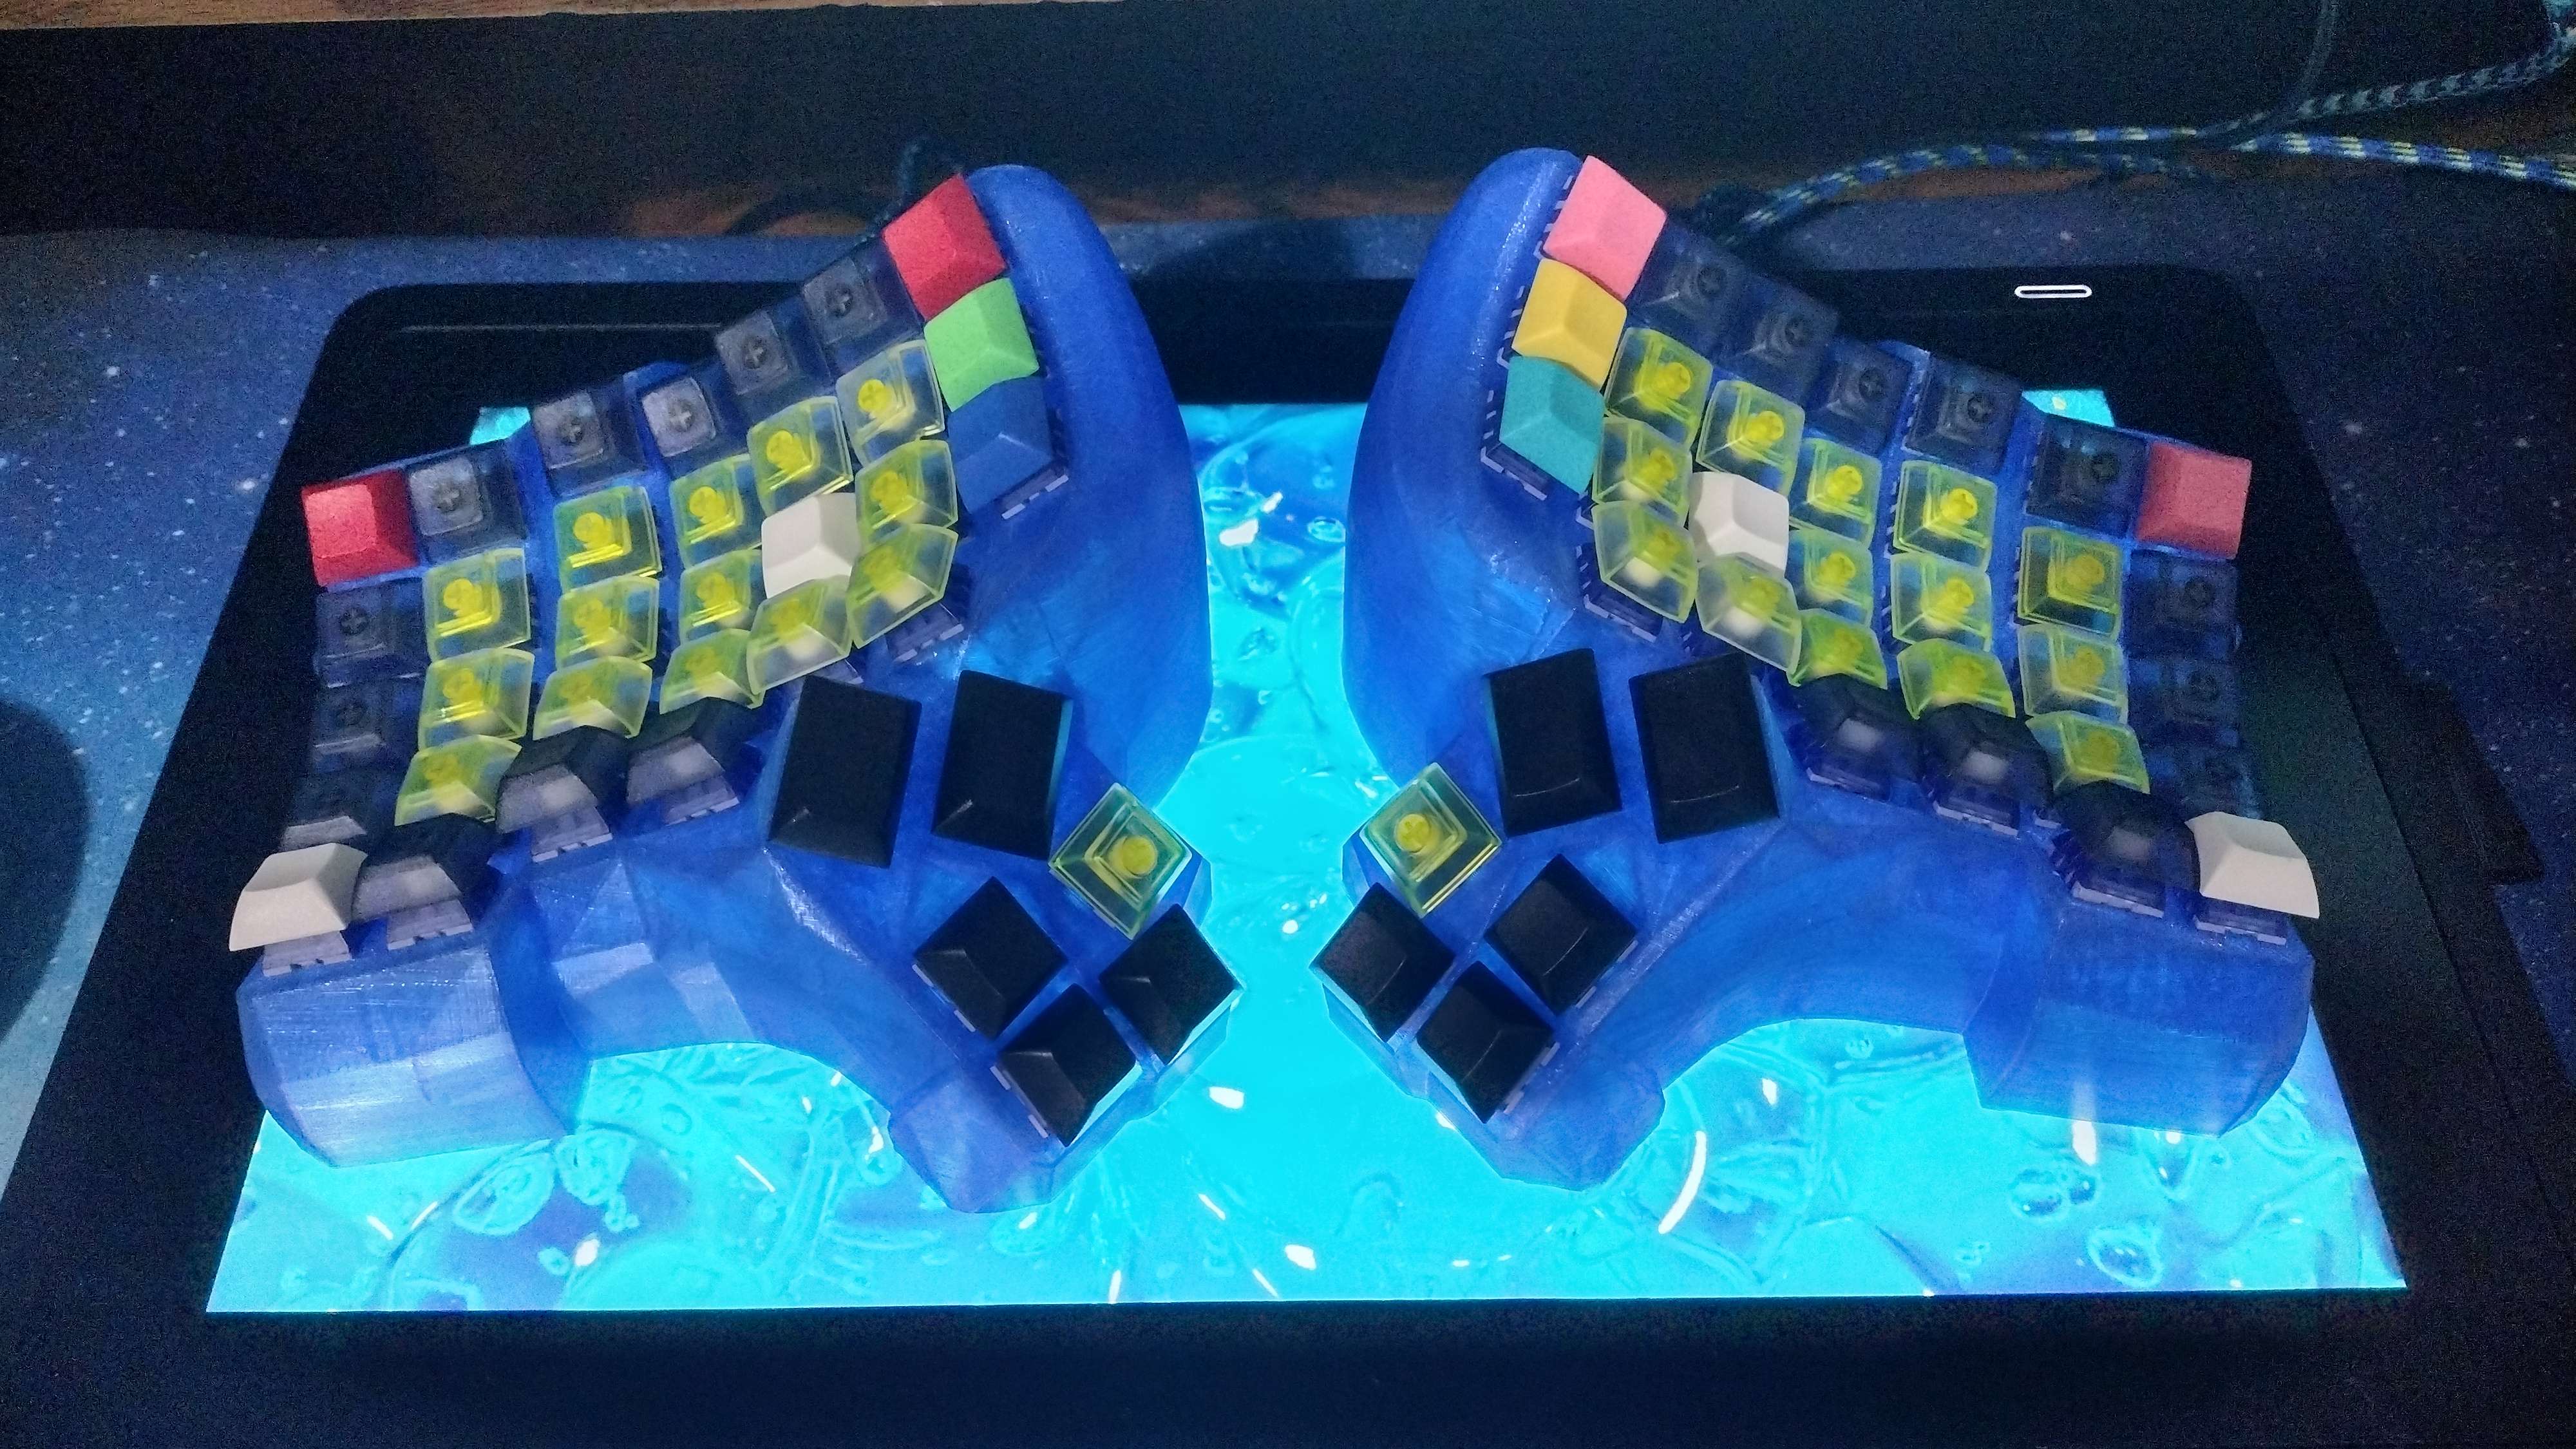
Everything printed out great, and since the last update I've actually assembled and wired both sides. I went with an arduino micro for the host unit and an MCP23018 expander chip to handle the input on the left unit. I used Deep Sea Kailh Box (v3) switches, the DIY cables from Zap, and DSA profile keycaps from aliexpress. Right now, it is completely functional, and I'm actually typing this on it right now.
For the switches, they are Kailh brand Deep Sea Box v3's, and they are FUCKING GOOD!!!!! They are advertised as silent linear switches, and it's true, these are pretty quiet. I didn't know this until after I bought them, but they have little rubber pads on the inside that keep them from clacking when they bottom out. I always put rubber rings on my caps to stop the clacking, but for these I don't need to do that. My last switches were some kind of very clicky Outemo's, and they are EXTREMELY scratchy compared to these. You can actually hear the spring squeaking inside when you press. The Deep Sea Kailh's are very smooth in comparison, and way quieter since they're linear instead of clicky. Extremely happy with these switches. Also, the store I got them from (SwitchCaptain) shipped them in a tin, so that was nice.
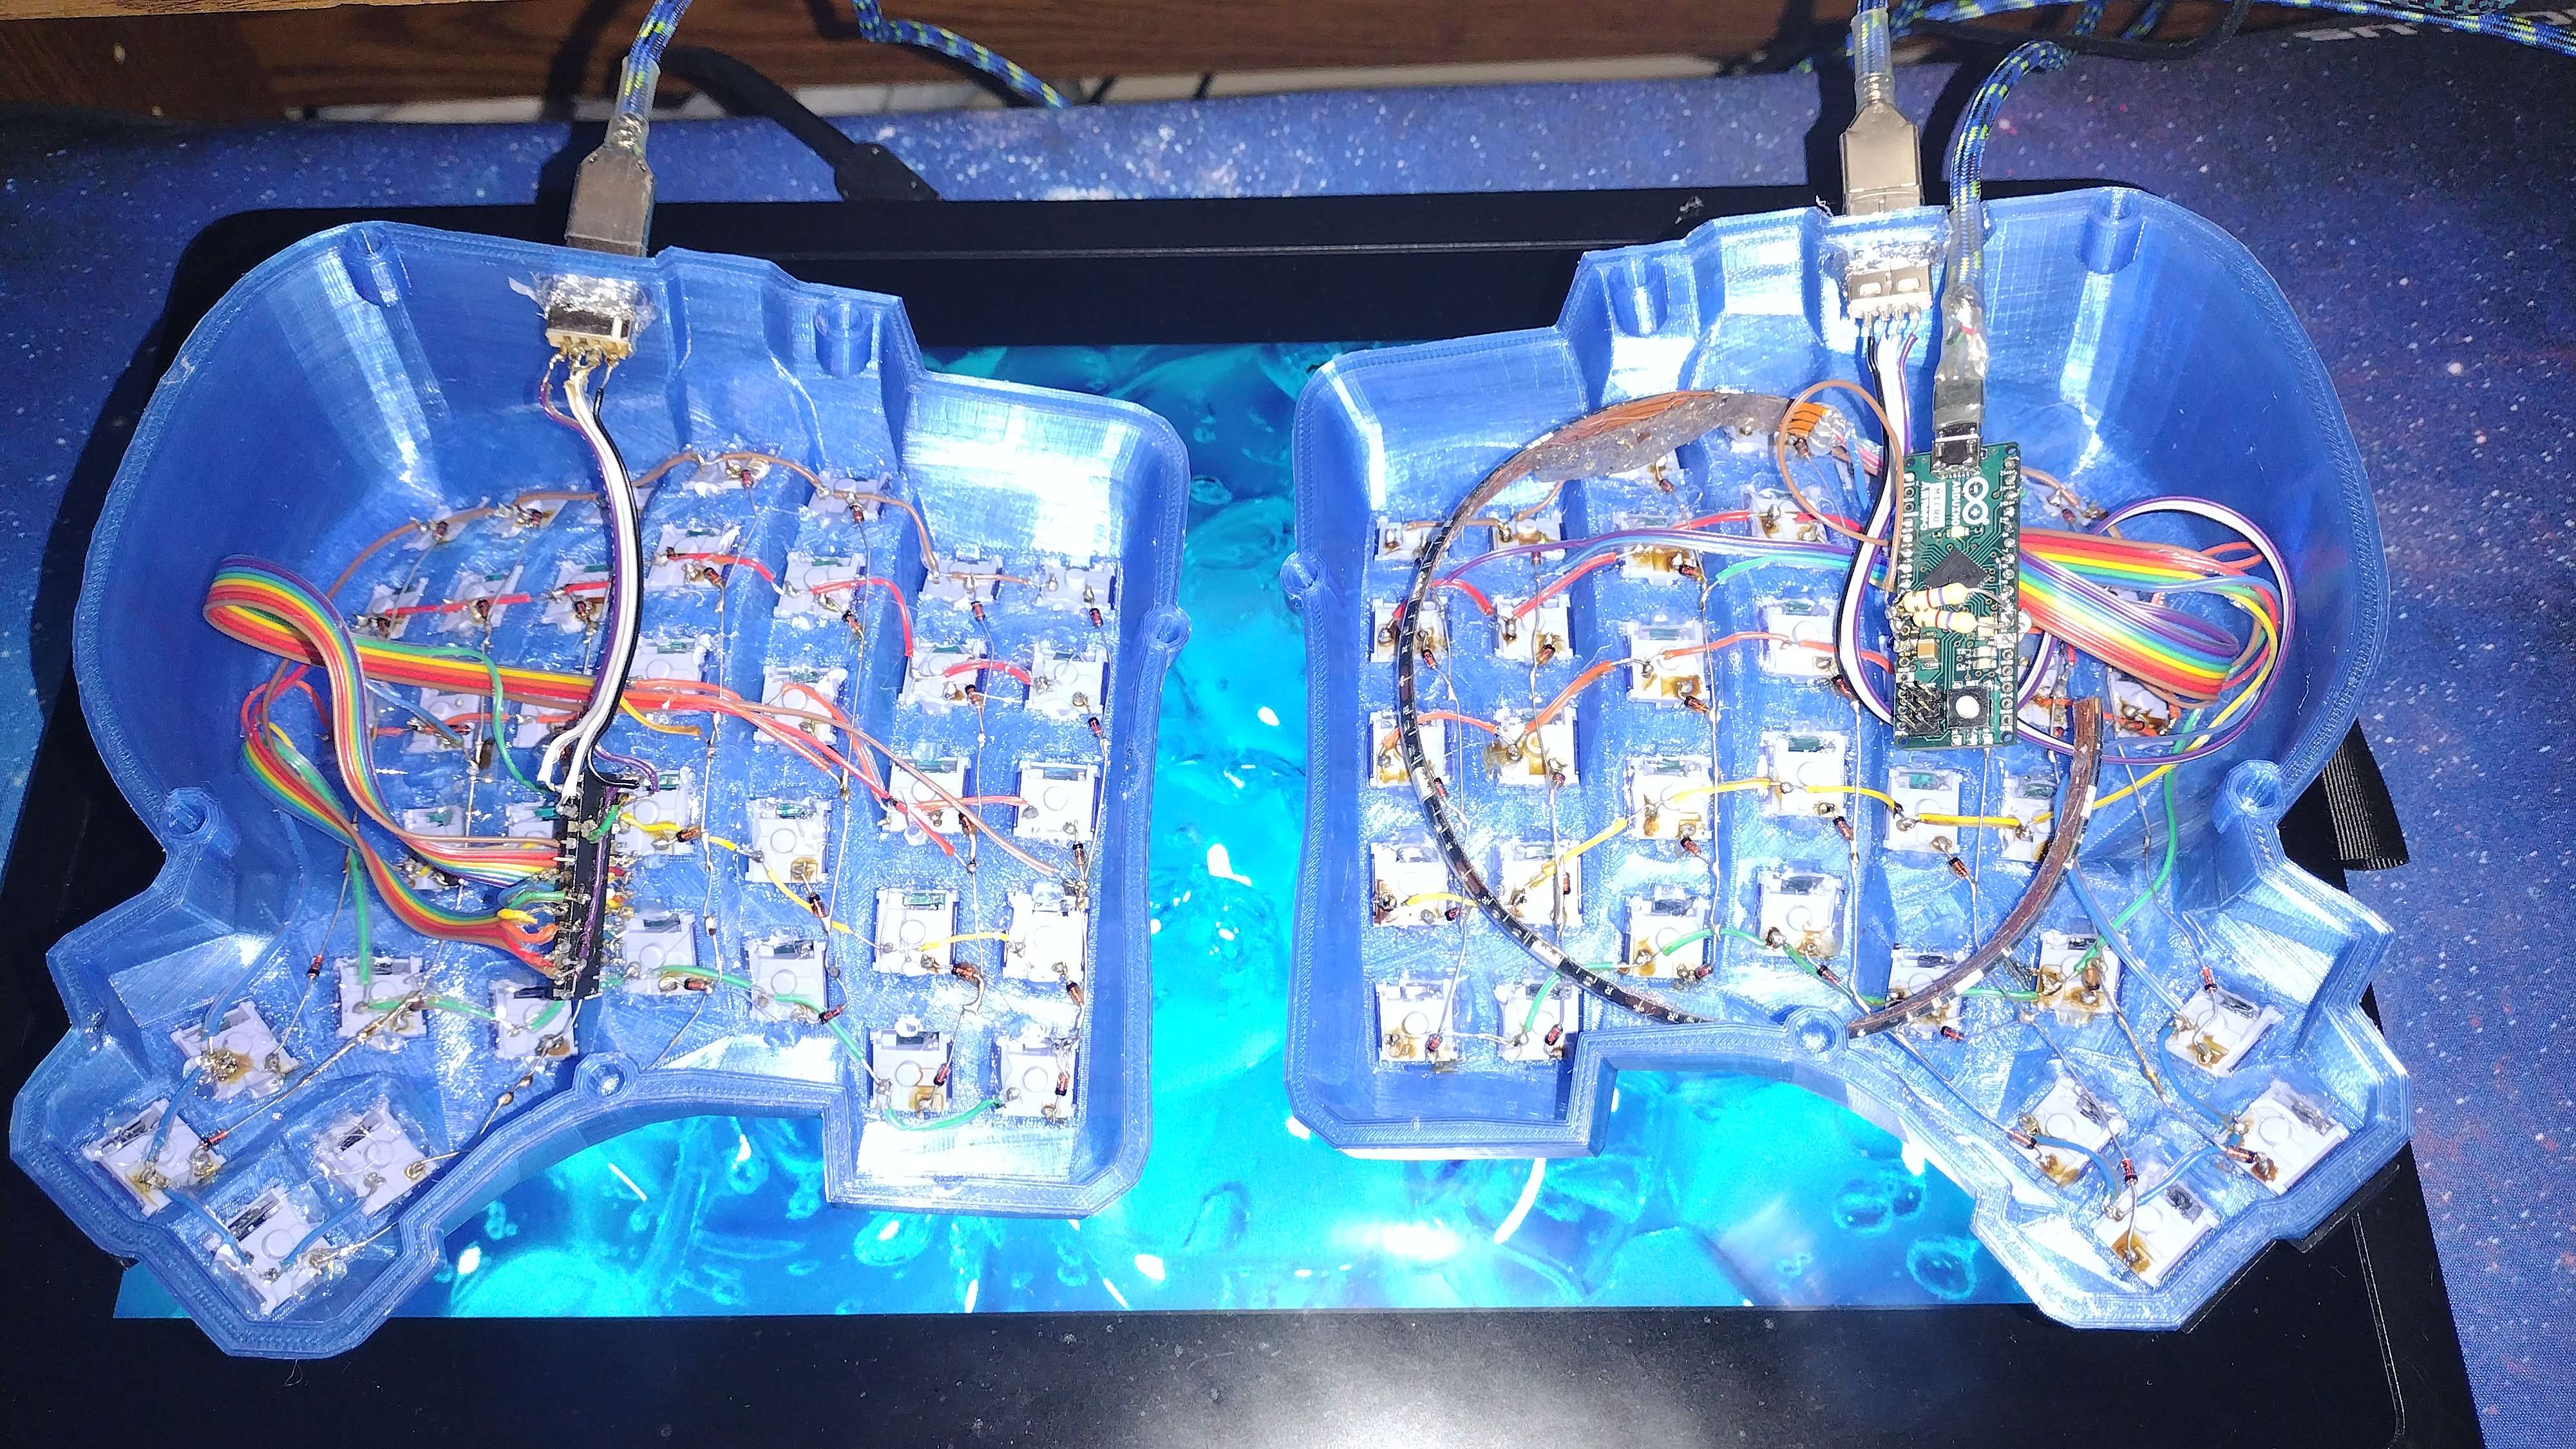
I followed the wiring guide in Adereth's Dactyl tutorial, and also noticed an error in the wiring that I don't remember having a problem with last time, but I needed to fix for this. My wiring is slightly different since I'm making a Manuform instead of a base Dactyl, and I have an extra column on each side as opposed to the default. I had a LOT of issues with the firmware due to my own errors. I used the handwired/dactyl in QMK, since that's what I used last time and it supports the MCP23018 expander.
Me Being Dumb About The Firmware
*Skip this if you don't want to read about me being dumb about the firmware*
It took me A VERY LONG TIME to realize that I could not just make a copy of the folder with a different name and have it work. The files inside need to be renamed and their #include lines updated to reflect that as well. The Dactyl firmware wasn't building for me because I made a copy I could make edits to, but I did not know this and thought it was because this firmware was a few years old now and maybe a QMK update made it lose support.. so I looked into other keyboard's firmware that used the MCP23018 and tried to get those to work. I was so clueless about the errors I was getting since I was not familiar with C programming AT ALL. I ended up doing the same thing with the folder renaming to like 3 other firmwares until I figured out I needed to update the *.h and *.c filenames. In case this somehow lands on google search results and I can help someone with the same issue, this was the error I was getting:
error: #error ("<keyboard>.h is only optional for data driven keyboards - kb.h == bad times") 28 | #error("<keyboard>.h is only optional for data driven keyboards - kb.h == bad times")
To fix this you need to make sure your (keyboard).h and (keyboard).c files have the same filename as the folder, and rename any reference to those filenames within the code as well.
The MCP23018
The MCP23018 is a 16 bit I/O expander chip. There are a couple variations of this with slightly different names, so make sure you get the right one (MCP23018-E/SP). Last time, I accidentally ordered the microscopic surface-mount version, because the big one was out of stock. You can't really do anything with it, the contacts are thinner than the wire I was using. If you can't find the E/SP version specifically, wait until it's back in stock, or use a different I/O expander. You'll have to look at the pin-out of the other I/O expander and figure out what goes where, though. (Or just use another arduino, since that's the more supported way to do a split keyboard with QMK. It's so wasteful though in my opinion, unless you need to have the option of using only one side?)
QMK firmware supports MCP23018 chips, and it has its own little driver too. Currently, I am trying to figure out the matrix.c file included in the Dactyl firmware, which is what lets it communicate with the MCP. I am not done with the board yet, because I want to get LEDs working on the left side. Doing the LEDs on the host side was easy, there is a function that lets you turn a pin on the logic board on/off, so toggling an LED from it is easy. Getting it to work from that MCP is something else entirely.. I don't have experience with electronic engineering outside of what I've done with keyboards so far, so figuring out how this chip works with no prior knowledge is hard. I am definitely missing some extremely basic information, so I'm at that magic part of learning something where you don't even know enough to know what to google.
Once I figure this thing out, I'll update this section.
Update (2023/2/18):
I learned that you just cannot do this with the MCP23018, you have to use a MCP23017. This update is several months after I finished working on this, so I don't remember all the details. From what I remember, I think the 23018 doesn't let you push enough voltage through the pins to toggle power to an LED.
Todo
From the pictures, it looks done, but I still need to do some things
- Print the bases (done)
- LEDs in MCP side (can't do)
- Palm rests (using my teal-board's palm rest)
- Customize keymap (always WIP)